Right now I am a Windows 8.1 user and have this issue too, I solved in that way.
1 - After installing the Google USB Drivers…
2 - Navigate to the <Path_To_Android>\Sdk\extras\google\usb_driver
3 - Open the file “android_winusb.inf”
4 - Search on Google.NTx86 and paste the text below
[Google.NTx86]
;Qualcomm SURF/FFA
%SingleAdbInterface% = USB_Install, USB\VID_05C6&PID_9025
%CompositeAdbInterface% = USB_Install, USB\VID_05C6&PID_9025&MI_01
%SingleBootLoaderInterface% = USB_Install, USB\VID_18D1&PID_D00D
;Qualcomm Devices
%CompositeAdbInterface% = USB_Install, USB\VID_05C6&PID_9091&MI_00
%CompositeAdbInterface% = USB_Install, USB\VID_05C6&PID_9091&MI_01
%CompositeAdbInterface% = USB_Install, USB\VID_05C6&PID_9091&MI_02
%CompositeAdbInterface% = USB_Install, USB\VID_05C6&PID_9091&MI_03
%CompositeAdbInterface% = USB_Install, USB\VID_05C6&PID_9092&MI_00
%CompositeAdbInterface% = USB_Install, USB\VID_05C6&PID_9092&MI_01
%CompositeAdbInterface% = USB_Install, USB\VID_05C6&PID_9092&MI_02
%CompositeAdbInterface% = USB_Install, USB\VID_05C6&PID_9092&MI_03
%CompositeAdbInterface% = USB_Install, USB\VID_05C6&PID_9025&MI_01
%CompositeAdbInterface% = USB_Install, USB\VID_05C6&PID_9024&MI_02
%CompositeAdbInterface% = USB_Install, USB\VID_05C6&PID_9015&MI_00
%CompositeAdbInterface% = USB_Install, USB\VID_05C6&PID_9018&MI_01
%CompositeAdbInterface% = USB_Install, USB\VID_05C6&PID_9029&MI_01
%CompositeAdbInterface% = USB_Install, USB\VID_05C6&PID_9031&MI_02
%CompositeAdbInterface% = USB_Install, USB\VID_05C6&PID_9037&MI_02
%CompositeAdbInterface% = USB_Install, USB\VID_05C6&PID_9035&MI_02
%CompositeAdbInterface% = USB_Install, USB\VID_05C6&PID_9053&MI_02
%CompositeAdbInterface% = USB_Install, USB\VID_05C6&PID_9039&MI_01
%CompositeAdbInterface% = USB_Install, USB\VID_05C6&PID_904E&MI_01
%CompositeAdbInterface% = USB_Install, USB\VID_05C6&PID_903A&MI_02
%CompositeAdbInterface% = USB_Install, USB\VID_05C6&PID_903F&MI_03
%CompositeAdbInterface% = USB_Install, USB\VID_05C6&PID_9022&MI_01
%CompositeAdbInterface% = USB_Install, USB\VID_05C6&PID_902D&MI_03
%CompositeAdbInterface% = USB_Install, USB\VID_05C6&PID_901D&MI_01
%CompositeAdbInterface% = USB_Install, USB\VID_05C6&PID_903B&MI_02
%CompositeAdbInterface% = USB_Install, USB\VID_05C6&PID_9042&MI_04
%CompositeAdbInterface% = USB_Install, USB\VID_05C6&PID_9044&MI_02
%CompositeAdbInterface% = USB_Install, USB\VID_05C6&PID_9046&MI_01
%CompositeAdbInterface% = USB_Install, USB\VID_05C6&PID_9059&MI_03
%CompositeAdbInterface% = USB_Install, USB\VID_05C6&PID_9060&MI_03
%CompositeAdbInterface% = USB_Install, USB\VID_05C6&PID_9064&MI_01
%CompositeAdbInterface% = USB_Install, USB\VID_05C6&PID_9065&MI_03
%CompositeAdbInterface% = USB_Install, USB\VID_05C6&PID_9082&MI_05
%CompositeAdbInterface% = USB_Install, USB\VID_05C6&PID_9084&MI_03
%CompositeAdbInterface% = USB_Install, USB\VID_05C6&PID_9098&MI_04
%CompositeAdbInterface% = USB_Install, USB\VID_05C6&PID_909A&MI_04
%CompositeAdbInterface% = USB_Install, USB\VID_05C6&PID_9091&MI_03
%CompositeAdbInterface% = USB_Install, USB\VID_05C6&PID_9020&MI_01
%CompositeAdbInterface% = USB_Install, USB\VID_05C6&PID_90B4&MI_03
%CompositeAdbInterface% = USB_Install, USB\VID_05C6&PID_90B6&MI_04
%CompositeAdbInterface% = USB_Install, USB\VID_05C6&PID_90B8&MI_04
5 - Repeat the above step to Google.NTamd64 as show in the text below
[Google.NTamd64]
;Qualcomm SURF/FFA
%SingleAdbInterface% = USB_Install, USB\VID_05C6&PID_9025
%CompositeAdbInterface% = USB_Install, USB\VID_05C6&PID_9025&MI_01
%SingleBootLoaderInterface% = USB_Install, USB\VID_18D1&PID_D00D
;Qualcomm Devices
%CompositeAdbInterface% = USB_Install, USB\VID_05C6&PID_9091&MI_00
%CompositeAdbInterface% = USB_Install, USB\VID_05C6&PID_9091&MI_01
%CompositeAdbInterface% = USB_Install, USB\VID_05C6&PID_9091&MI_02
%CompositeAdbInterface% = USB_Install, USB\VID_05C6&PID_9091&MI_03
%CompositeAdbInterface% = USB_Install, USB\VID_05C6&PID_9092&MI_00
%CompositeAdbInterface% = USB_Install, USB\VID_05C6&PID_9092&MI_01
%CompositeAdbInterface% = USB_Install, USB\VID_05C6&PID_9092&MI_02
%CompositeAdbInterface% = USB_Install, USB\VID_05C6&PID_9092&MI_03
%CompositeAdbInterface% = USB_Install, USB\VID_05C6&PID_9025&MI_01
%CompositeAdbInterface% = USB_Install, USB\VID_05C6&PID_9024&MI_02
%CompositeAdbInterface% = USB_Install, USB\VID_05C6&PID_9015&MI_00
%CompositeAdbInterface% = USB_Install, USB\VID_05C6&PID_9018&MI_01
%CompositeAdbInterface% = USB_Install, USB\VID_05C6&PID_9029&MI_01
%CompositeAdbInterface% = USB_Install, USB\VID_05C6&PID_9031&MI_02
%CompositeAdbInterface% = USB_Install, USB\VID_05C6&PID_9037&MI_02
%CompositeAdbInterface% = USB_Install, USB\VID_05C6&PID_9035&MI_02
%CompositeAdbInterface% = USB_Install, USB\VID_05C6&PID_9053&MI_02
%CompositeAdbInterface% = USB_Install, USB\VID_05C6&PID_9039&MI_01
%CompositeAdbInterface% = USB_Install, USB\VID_05C6&PID_904E&MI_01
%CompositeAdbInterface% = USB_Install, USB\VID_05C6&PID_903A&MI_02
%CompositeAdbInterface% = USB_Install, USB\VID_05C6&PID_903F&MI_03
%CompositeAdbInterface% = USB_Install, USB\VID_05C6&PID_9022&MI_01
%CompositeAdbInterface% = USB_Install, USB\VID_05C6&PID_902D&MI_03
%CompositeAdbInterface% = USB_Install, USB\VID_05C6&PID_901D&MI_01
%CompositeAdbInterface% = USB_Install, USB\VID_05C6&PID_903B&MI_02
%CompositeAdbInterface% = USB_Install, USB\VID_05C6&PID_9042&MI_04
%CompositeAdbInterface% = USB_Install, USB\VID_05C6&PID_9044&MI_02
%CompositeAdbInterface% = USB_Install, USB\VID_05C6&PID_9046&MI_01
%CompositeAdbInterface% = USB_Install, USB\VID_05C6&PID_9059&MI_03
%CompositeAdbInterface% = USB_Install, USB\VID_05C6&PID_9060&MI_03
%CompositeAdbInterface% = USB_Install, USB\VID_05C6&PID_9064&MI_01
%CompositeAdbInterface% = USB_Install, USB\VID_05C6&PID_9065&MI_03
%CompositeAdbInterface% = USB_Install, USB\VID_05C6&PID_9082&MI_05
%CompositeAdbInterface% = USB_Install, USB\VID_05C6&PID_9084&MI_03
%CompositeAdbInterface% = USB_Install, USB\VID_05C6&PID_9098&MI_04
%CompositeAdbInterface% = USB_Install, USB\VID_05C6&PID_909A&MI_04
%CompositeAdbInterface% = USB_Install, USB\VID_05C6&PID_9091&MI_03
%CompositeAdbInterface% = USB_Install, USB\VID_05C6&PID_9020&MI_01
%CompositeAdbInterface% = USB_Install, USB\VID_05C6&PID_90B4&MI_03
%CompositeAdbInterface% = USB_Install, USB\VID_05C6&PID_90B6&MI_04
%CompositeAdbInterface% = USB_Install, USB\VID_05C6&PID_90B8&MI_04
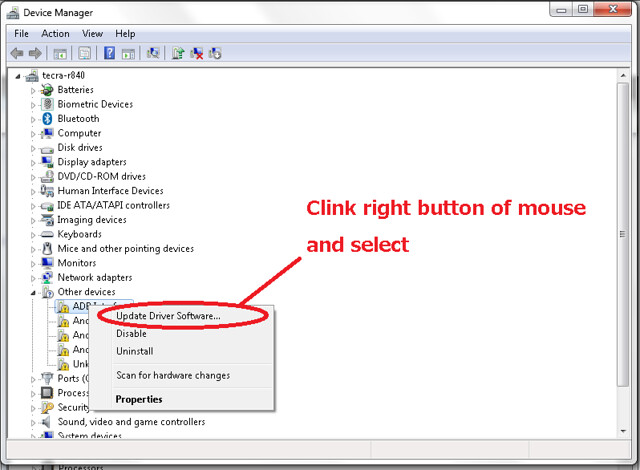
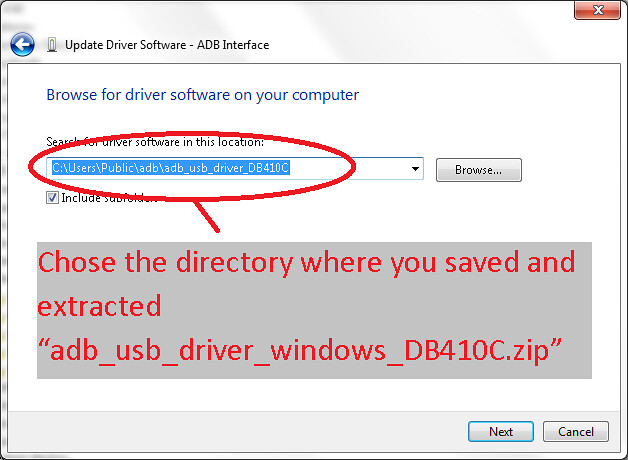
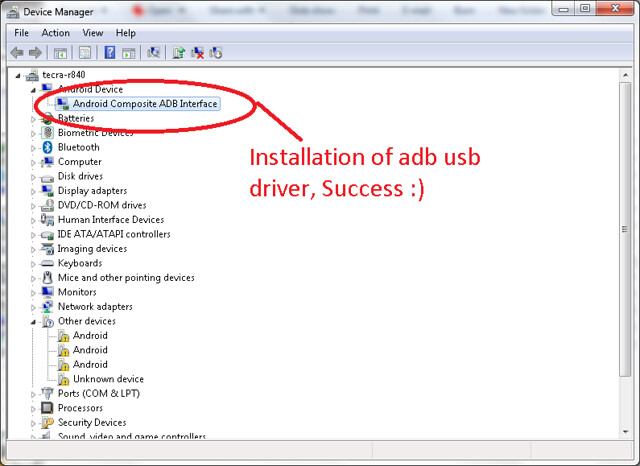
6 - Follow the Akira steps to update the driver (this guide, top of the discussion)
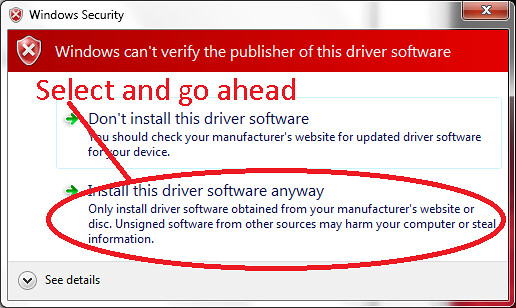
6.1 - If you have a signature error and could not install use this steps in the link below (have to restart for the changes to apply)
http://www.craftedge.com/tutorials/driver_install_windows8/driver_install_win8.html
6.2 - After restarting, do again the step 6
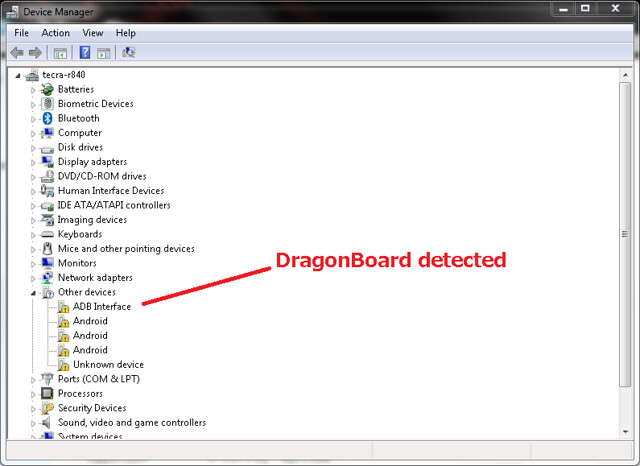
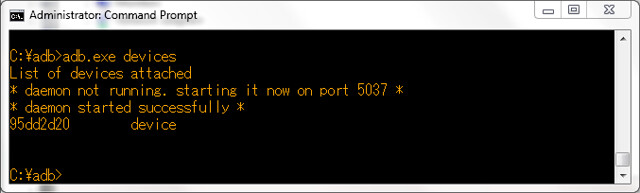
7 - Open a terminal and insert “adb devices” command (without double quotes). You should see your device if connected and NOT in fastboot mode, remember to check the dip-switches.
Resources
Reference Document http://www.embedded101.com/Blogs/David-Jones/entryid/745/Dragonboard-410C-Android-Hello-World-Setup-
Driver Signature Craft Edge: Install Driver for Sizzix eclips on Windows 8
http://www.technipages.com/enable-disable-device-driver-signing